Now that we have our source code versioned and safely stored, we need a way to make it go to our S3 bucket, otherwise it won't be visible to the public. There are, as usual, many ways to address this scenario, but as a developer, I can't live without CI/CD integration for all my processes. In this case, we have a very simple process, and we can combine the building and deploying steps in one go. To do that, once again, AWS offers some useful services, I'll be using CodeBuild for this task.
Creating the access policy
Just like anything in AWS, a CodeBuild project needs access to other AWS services and resources. The way this is done is by applying service roles with policies. As per AWS docs, a CodeBuild project needs the following permissions:
- logs:CreateLogGroup
- logs:CreateLogStream
- logs:PutLogEvents
- codecommit:GitPull
- s3:GetObject
- s3:GetObjectVersion
- s3:PutObject
The difference is that the proposed policy in the docs does not restrict access to any resource, it suggests to change the * to something more specific. The following is the resulting policy restricting access to logs in the log group created by the CodeBuild project. Also I've added full access to the bucket, since we'll be copying files to that bucket. In summary, the policy below grants the following permissions (account id is masked with 111111111111):
- Access to create new log groups in CloudWatch
- Access to create new log streams within the log group created by the build project
- Access to create new log events within the log stream created by the build project
- Access to pull data through Git to CodeCommit repository
- Full Access to our S3 bucket where the files will go
{
    "Version": "2012-10-17",
    "Statement": [
        {
            "Action": [
                "logs:CreateLogGroup",
                "s3:ListObjects"
            ],
            "Resource": "*",
            "Effect": "Allow",
            "Sid": "AccessLogGroupsS3ListObjects"
        },
        {
            "Action": [
                "codecommit:GitPull",
                "logs:CreateLogStream",
                "logs:PutLogEvents"
            ],
            "Resource": [
                "arn:aws:logs:eu-west-1:111111111111:log-group:/aws/codebuild/
                 abelperez-stack-builder",
                "arn:aws:logs:eu-west-1:111111111111:log-group:/aws/codebuild/
                 abelperez-stack-builder:*",
                "arn:aws:codecommit:eu-west-1:111111111111:abelperez.info-web"
            ],
            "Effect": "Allow",
            "Sid": "AccessGitLogs"
        },
        {
            "Action": "s3:*",
            "Resource": [
                "arn:aws:s3:::www.abelperez.info",
                "arn:aws:s3:::www.abelperez.info/*"
            ],
            "Effect": "Allow",
            "Sid": "AccessS3staticBucket"
        }
    ]
}
Creating the service role
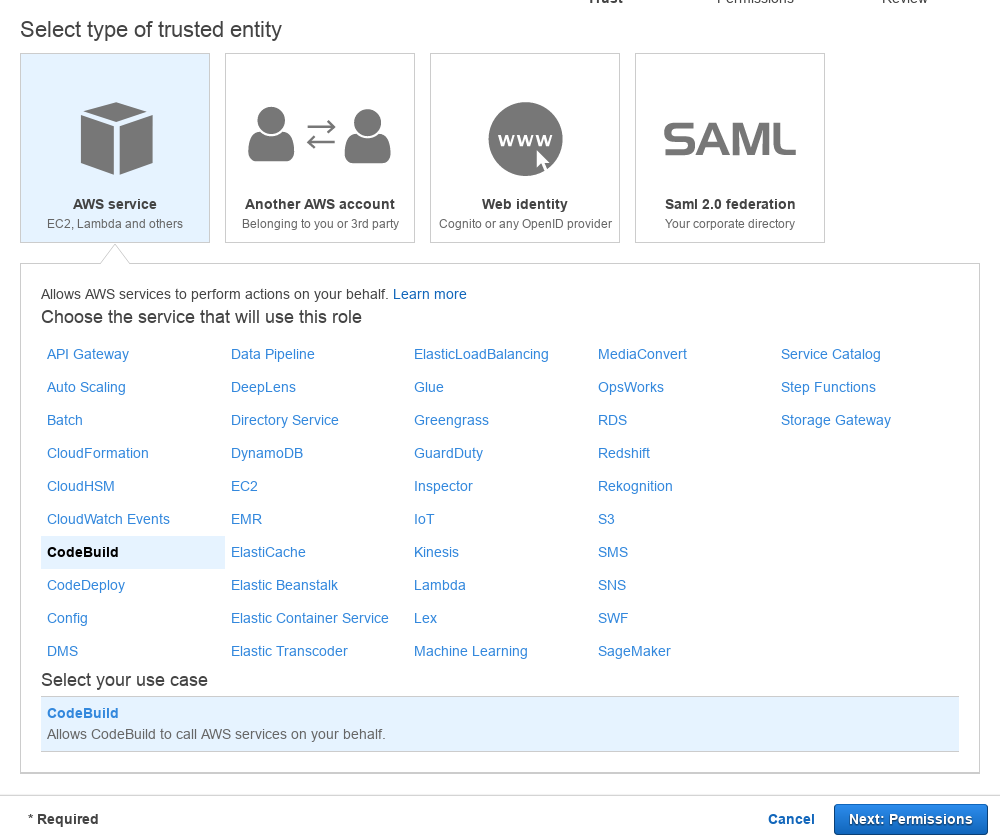
Go to IAM console, select Roles from the left hand side menu, click on Create Role. On the Select type of trusted entity screen, select AWS service EC2, Lambda and others and from the options, CodeBuild
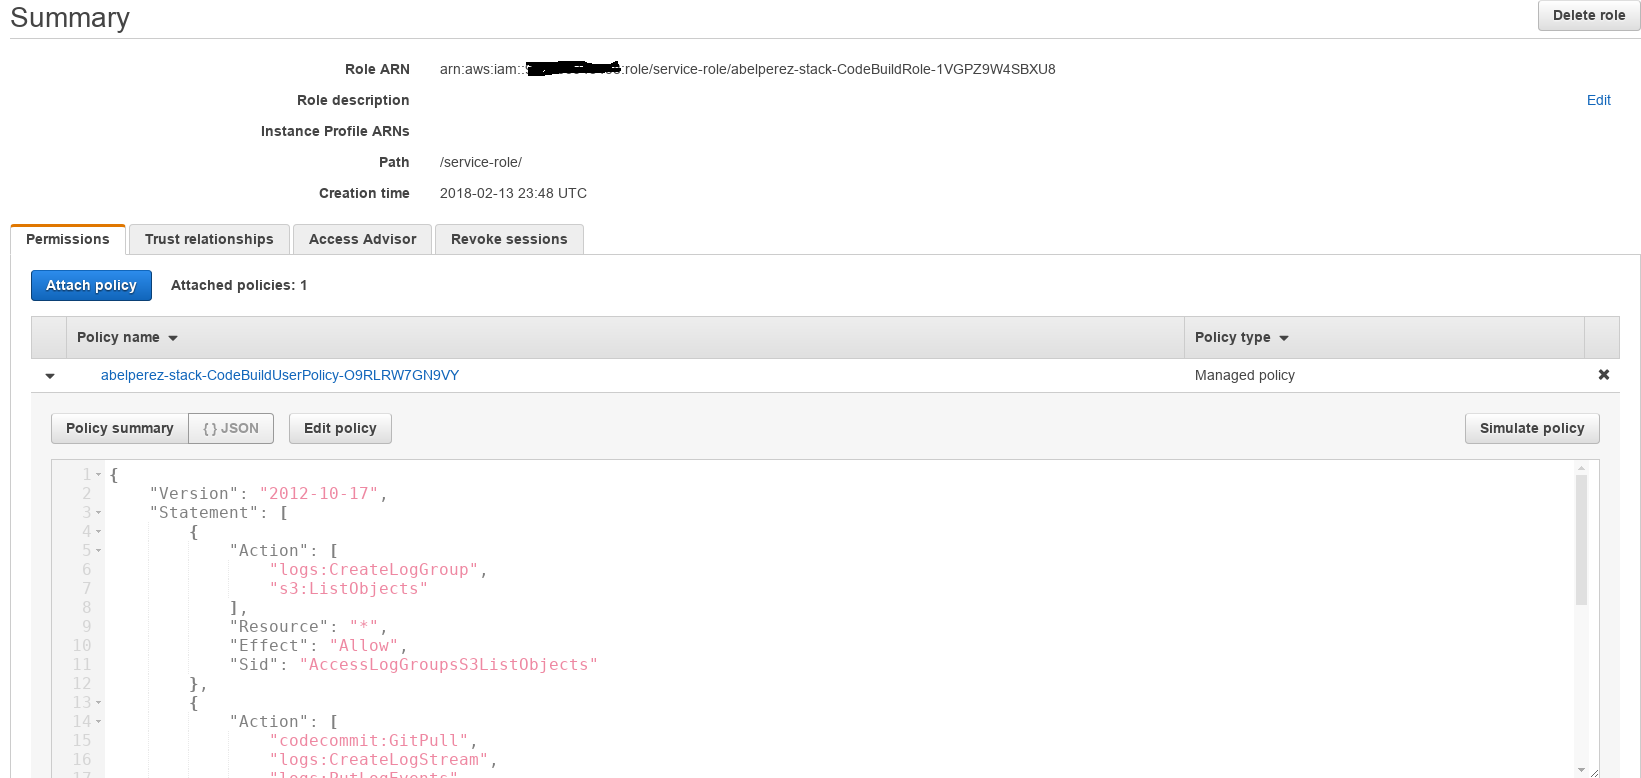
Click Next: Permissions, at this point, we can create a policy with the JSON above or continue to Review and then add the policy later. To create the policy, click Create Policy button, select JSON tab, paste the JSON above, Review and Create Policy, then back to role permission screen, refresh and select the policy. Give it a name, something like CodeBuildRole or anything meaningful and click on Create Role to finish the process.
Creating the CodeBuild project
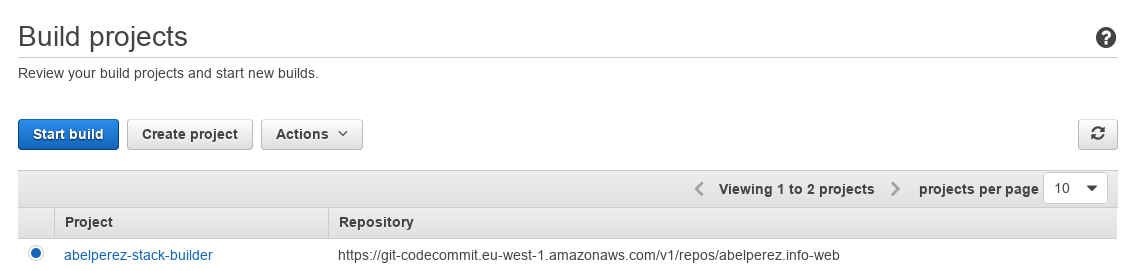
With all permissions set, let's start with the actual CodeBuild project, where we'll specify the source code origin, build environment, artifacts and role. On CodeBuild console, if it's the first project, click Get Started, otherwise select Build projects from the left hand side menu, and click on Create Project
Enter the following values:
- Project name* a meaningful name i.e "abelperez-stack-builder"
- Source provider* select "AWS CodeCommit"
- Repository* select the repository previously created
- Environment image* select "Use an image managed by AWS CodeBuild"
- Operating system* select "Ubuntu"
- Runtime* select "Node.js"
- Runtime version* select "aws/codebuild/nodejs:6.3.1"
- Buildspec name leave default "buildspec.yml"
- Artifacts: Type* select "No artifacts"
- Role name* select the previously created role
After finishing all the input, review and save the project.
Creating the build spec file
When creating the CodeBuild project, one of the input parameters is the Buildspec file name, which refers to the description of our build process. In this case, it's very simple process:
- BUILD: Create a directory dist to copy all output files
- BUILD: Copy all .html file to dist
- POST_BUILD: Synchronise all content of dist folder with www.abelperez.info S3 bucket
The complete buildspec.yml containing the above steps:
version: 0.2

phases:
  build:
    commands:
      - mkdir dist
      - cp *.html dist/

  post_build:
    commands:
      - aws s3 sync ./dist s3://www.abelperez.info/ --delete --acl=public-read
The last step is executed on post build phase, which is at the end of the all build steps when everything is ready to package / deploy or in this case ship to our S3 bucket. This is done by using the sync subcommand of s3 service from AWS Command line interface. It basically takes an origin and a destination and make them to be in sync.
--delete instructs to remove files in the destination that are not in the source, because by default they are not deleted.
--acl=public-read instructs to edit bucket objects' ACL, in this case read access to everyone.
At this point, we can remove the bucket policy previously created if we wish so, since every single file will be publicly accessible, that would allow to have other folders in the same bucket and not being accessible. It will depend on the use case for the website.
Let's test it
It's time to verify if everything is in the right place. We have the build project with some basic commands to run and assuming the above code is saved in a file named buildspec.yml at root level of the code repository, the next step is to commit and push that file to CodeCommit.

Let's go back to CodeBuild console, select the build project we've just created and click Start build, then choose the right branch (master in my case) and once again Start build.

No comments:
Post a Comment