Showing posts with label aws. Show all posts

Sunday, 17 October 2021

How to fix “failed to parse field [xxxxxx] in document with id [yyyyy]. Preview of field's value: ‘zzzzzzz’”

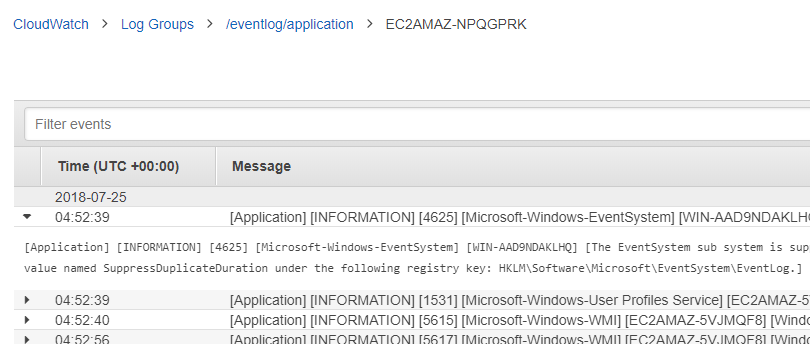
I came across this issue while chasing the infamous “[ warn] [engine] failed to flush chunk” in fluent-bit connected to Elasticsearch. For some context, I'm using Amazon EKS to run my workloads and I use fluent-bit to parse the logs and push them to Elasticsearch so I can query them later on using Kibana.

The first step in this investigation was to set "Trace_Error On" in [OUTPUT] section as part of the fluent-bit configuration, a config map in this instance.

What is the problem ?

[2021/10/07 11:03:51] [ warn] [engine] failed to flush chunk '1-1633604630.
197484999.flb', retry in 11 seconds: task_id=29, input=tail.0 > output=es.0 
(out_id=0)
[2021/10/07 11:03:52] [error] [output:es:es.0] error: Output

{
    "create": {
        "_index": "fluent-bit-000135",
        "_type": "_doc",
        "_id": "qQZsWnwBkg-cCPSefqtj",
        "status": 400,
        "error": {
            "type": "mapper_parsing_exception",
            "reason": "failed to parse field [log_processed.Properties.
StatusCode] of type [long] in document with id 'qQZsWnwBkg-cCPSefqtj'. 
Preview of field's value: 'Unauthorized'",
            "caused_by": {
                "type": "illegal_argument_exception",
                "reason": "For input string: \"Unauthorized\""
            }
        }
    }
},

... more logs, removed for brevity ...

This essentially means that the field "log_processed.Properties.StatusCode" was initially mapped (automatically in my case) as "long" and therefore it won't allow the current value "Unauthorized" due to it not being able to parse that as a long value. It's probably my mistake initially not having mapped explictily to a "text" value instead, I could've avoided this situation. But I didn't and here we are.

What is the solution ?

Basically, you need to let Elasticsearch know about the data types in your indexes. A common pattern when working with Elasticearch and Kibana is to creata a State management policy to automatically rolls over your data to a new index and eventually delete old data to avoid disk space to run too low. This requires to have index templates in place so Elasticsearch knows how to create new indexes when the time comes to roll over.

I already use a policy that deletes indices older than 14 days and rolls over after either 1 day or 1 GB of size.

At this point, I'm not terribly bothered about existing data, my priority is to keep new data in good shape. Old data should be reindexed if you want to rescue it and make it available to search on.

What needs to be done is to add a mapping to the index template (assuming you have already one) that contains the property name and type explictily declared.

How to do it ?

Luckily, Kibana gives us a good developer console, that we can run the commands against Elasticsearch endpoints.

Using Kibana Dev Tools Console which you can find under
"https://<your-endpoint>/_plugin/kibana/app/dev_tools#/console"

1 - Update the template

Under "mappings/properties", add a new entry with the property name and type, in this case "log_processed.Properties.StatusCode" of type "text". This will not impact any existing data.

PUT /_index_template/ism_retention_14d
{
  "index_patterns": ["fluent-bit-*"],
  "template": {
    "mappings": {
      "properties": {
        "@timestamp": {
          "type": "date_nanos"                 
        },
        "log_processed.Properties.StatusCode": {
          "type": "text"                 
        }
      }
    },
    "settings": {
      "index.opendistro.index_state_management.rollover_alias":"fluent-bit",
      "sort.field": [ "@timestamp"],          
      "sort.order": [ "desc"]
    }
  }
}

2- Verify it's updated

This is only to double check that the change has been applied with the correct values for new indexes to be created matching the pattern (fluent-bit-*) in this case.

GET /_index_template/ism_retention_14d
{
  "index_templates" : [
    {
      "name" : "ism_retention_14d",
      "index_template" : {
        "index_patterns" : [
          "fluent-bit-*"
        ],
        "template" : {
          "settings" : {
            "index" : {
              "opendistro" : {
                "index_state_management" : {
                  "rollover_alias" : "fluent-bit"
                }
              },
              "sort" : {
                "field" : [
                  "@timestamp"
                ],
                "order" : [
                  "desc"
                ]
              }
            }
          },
          "mappings" : {
            "properties" : {
              "@timestamp" : {
                "type" : "date_nanos"
              },
              "log_processed.Properties.StatusCode" : {
                "type" : "text"
              }
            }
          }
        },
        "composed_of" : [ ]
      }
    }
  ]
}

3- Create new index (+1 the current sequence)

Find out which is the latest sequence number in this index parttern (fluent-bit-000135 in this case), add 1 and create a new index with that name (fluent-bit-000136 in this case).

PUT /fluent-bit-000136
{
  "acknowledged" : true,
  "shards_acknowledged" : true,
  "index" : "fluent-bit-000136"
}

4- Verify the mapping is actually in place

Once the index has been created, it should have inherited that mappings from the template updated above.

GET /fluent-bit-000136/_mapping/field/log_processed.Properties.StatusCode
{
  "fluent-bit-000136" : {
    "mappings" : {
      "log_processed.Properties.StatusCode" : {
        "full_name" : "log_processed.Properties.StatusCode",
        "mapping" : {
          "StatusCode" : {
            "type" : "text"
          }
        }
      }
    }
  }
}

5- Update the alias with "is_write_index"

The new index is now ready to start receiving data. To accomplish that, set the "is_write_index" property to true in the new index and to false in the current target index.

POST /_aliases
{
  "actions" : [
    { "add" : { 
      "index" : "fluent-bit-000135", 
      "alias" : "fluent-bit", 
      "is_write_index": false 
      }
    },
    { "add" : {
      "index" : "fluent-bit-000136", 
      "alias" : "fluent-bit", 
      "is_write_index": true 
      }
    }
  ]
}

6- Verify the aliases are correct

Verify the "is_write_index" property is set appropriately to each index from the previous step.

GET fluent-bit-000135/_alias
{
  "fluent-bit-000135" : {
    "aliases" : {
      "fluent-bit" : {
        "is_write_index" : false
      }
    }
  }
}

GET fluent-bit-000136/_alias
{
  "fluent-bit-000136" : {
    "aliases" : {
      "fluent-bit" : {
        "is_write_index" : true
      }
    }
  }
}

Conclusion

Following these steps will help you to stop those errors that prevent the logs from being added to Elasticsearch and therefore missing from your queries and potentially from alerts based on that information.

Having state management policies is crucial to achieve a sensible retention policy as well as avoiding creating too large indexes. It also eases the process of updating the template from time to time to keep up with your applications' needs.

Saturday, 11 April 2020

AWS HttpApi with Cognito as JWT Authorizer

With the recent release of HttpApi from AWS I've been playing with it for a bit and I wanted to see how far I can get it to use authorization without handling any logic in my application.

Creating a base code

Started with a simple base, let's set up the initial scenario which is no authentication at all. The architecture is the typical HttpApi -> Lambda, in this case, the Lambda content is irrelevant and therefore I've just used an inline code to test it's working.

AWSTemplateFormatVersion: '2010-09-09'
Transform: AWS::Serverless-2016-10-31
Description: >
  Sample SAM Template using HTTP API and Cognito Authorizer
Resources:

  # Dummy Lambda function 
  HttpApiTestFunction:
    Type: AWS::Serverless::Function
    Properties:
      InlineCode: |
        exports.handler = function(event, context, callback) {
          const response = {
            test: 'Hello HttpApi',
            claims: event.requestContext.authorizer && 
                    event.requestContext.authorizer.jwt.claims
          };
          callback(null, response);
        };
      Handler: index.handler
      Runtime: nodejs12.x
      Timeout: 30
      MemorySize: 256
      Events:
        GetOpen:
          Type: HttpApi
          Properties:
            Path: /test
            Method: GET
            ApiId: !Ref HttpApi
            Auth:
              Authorizer: NONE

  HttpApi:
    Type: AWS::Serverless::HttpApi
    Properties:
      CorsConfiguration: 
        AllowOrigins:
          - "*"

Outputs:
  HttpApiUrl:
    Description: URL of your API endpoint
    Value: !Sub 'https://${HttpApi}.execute-api.${AWS::Region}.${AWS::URLSuffix}/'
  HttpApiId:
    Description: Api id of HttpApi
    Value: !Ref HttpApi

With the outputs of this template we can hit the endpoint and see that in fact, it's accessible. So far, nothing crazy here.

$ curl https://abc1234.execute-api.us-east-1.amazonaws.com/test
{"test":"Hello HttpApi"}

Creating a Cognito UserPool and Client

The claims object is not populated because the request wasn't authenticated since no token was provided, as expected.

Let's create the Cognito UserPool with a very simple configuration assuming lots of default values since they're not relevant for this example.

  ## Add this fragment under Resources:

  # User pool - simple configuration 
  UserPool:
    Type: AWS::Cognito::UserPool
    Properties: 
      AdminCreateUserConfig: 
        AllowAdminCreateUserOnly: false
      AutoVerifiedAttributes: 
        - email
      MfaConfiguration: "OFF"
      Schema: 
        - AttributeDataType: String
          Mutable: true
          Name: name
          Required: true
        - AttributeDataType: String
          Mutable: true
          Name: email
          Required: true
      UsernameAttributes: 
        - email
  
  # User Pool client
  UserPoolClient:
    Type: AWS::Cognito::UserPoolClient
    Properties: 
      ClientName: AspNetAppLambdaClient
      ExplicitAuthFlows: 
        - ALLOW_USER_PASSWORD_AUTH
        - ALLOW_USER_SRP_AUTH
        - ALLOW_REFRESH_TOKEN_AUTH
      GenerateSecret: false
      PreventUserExistenceErrors: ENABLED
      RefreshTokenValidity: 30
      SupportedIdentityProviders: 
        - COGNITO
      UserPoolId: !Ref UserPool

  ## Add this fragment under Outputs:

  UserPoolId:
    Description: UserPool ID
    Value: !Ref UserPool
  UserPoolClientId:
    Description: UserPoolClient ID
    Value: !Ref UserPoolClient

Once we have the cognito UserPool and a client, we are in a position to start putting things together. But before there are a few things to clarify:

  • Username is the email and only two fields are required to create a user: name and email.
  • The client defines both ALLOW_USER_PASSWORD_AUTH and ALLOW_USER_SRP_AUTH Auth flows to be used by different client code.
  • No secret is generated for this client, if you intend to use other flows, you'll need to create other clients accordingly.

Adding authorization information

Next step is to add authorization information to the HttpApi.

  ## Replace the HttpApi resource with this one.

  HttpApi:
    Type: AWS::Serverless::HttpApi
    Properties:
      CorsConfiguration: 
        AllowOrigins:
          - "*"
      Auth:
        Authorizers:
          OpenIdAuthorizer:
            IdentitySource: $request.header.Authorization
            JwtConfiguration:
              audience:
                - !Ref UserPoolClient
              issuer: !Sub https://cognito-idp.${AWS::Region}.amazonaws.com/${UserPool}
        DefaultAuthorizer: OpenIdAuthorizer

We've added authorization information to the HttpApi where JWT issuer is the the Cognito UserPool previously created and the token are intended only for that client.

If we test again, nothing changes because the event associated with the lambda function says explictly "Authorizer: NONE".

To test this, we'll create a new event associated with the same lambda function but this time we'll add some authorization information to it.

        ## Add this fragment at the same level as GetOpen
        ## under Events as part of the function properties

        GetSecure:
          Type: HttpApi
          Properties:
            ApiId: !Ref HttpApi
            Method: GET
            Path: /secure
            Auth:
              Authorizer: OpenIdAuthorizer

If we test the new endpoint /secure, then we'll see the difference.

$ curl -v https://abc1234.execute-api.us-east-1.amazonaws.com/secure

>>>>>> removed for brevity >>>>>>
> GET /secure HTTP/1.1
> Host: abc1234.execute-api.us-east-1.amazonaws.com
> User-Agent: curl/7.52.1
> Accept: */*
> 
* Connection state changed (MAX_CONCURRENT_STREAMS updated)!
< HTTP/2 401 
< date: Sat, 11 Apr 2020 17:19:50 GMT
< content-length: 26
< www-authenticate: Bearer
< apigw-requestid: K1RYliB1IAMESNA=
< 
* Curl_http_done: called premature == 0
* Connection #0 to host abc1234.execute-api.us-east-1.amazonaws.com left intact

{"message":"Unauthorized"}

At this point we have a new endpoint that requires an access token. Now we need a token, but to get a token, we need a user first.

Fortunately Cognito can provide us with all we need in this case. Let's see how.

Creating a Cognito User

Cognito cli provides the commands to sign up and verify user accounts.

$ aws cognito-idp sign-up \
  --client-id asdfsdfgsdfgsdfgfghsdf \
  --username abel@example.com \
  --password Test.1234 \
  --user-attributes Name="email",Value="abel@example.com" Name="name",Value="Abel Perez" \
  --profile default \
  --region us-east-1

{
    "UserConfirmed": false, 
    "UserSub": "aaa30358-3c09-44ad-a2ec-5f7fca7yyy16", 
    "CodeDeliveryDetails": {
        "AttributeName": "email", 
        "Destination": "a***@e***.com", 
        "DeliveryMedium": "EMAIL"
    }
}

After creating the user, it needs to be verified.

$ aws cognito-idp admin-confirm-sign-up \
  --user-pool-id us-east-qewretry \
  --username abel@example.com \
  --profile default \
  --region us-east-1

This commands gives no output, to test we are good to go, let's use the admin-get-user command

$ aws cognito-idp admin-get-user \
  --user-pool-id us-east-qewretry \
  --username abel@example.com \
  --profile default \
  --region us-east-1 \
  --query UserStatus

"CONFIRMED"

We have a confirmed user!

Getting a token for the Cognito User

To obtain an Access Token, we use the Cognito initiate-auth command providing the client, username and password.

$ TOKEN=`aws cognito-idp initiate-auth \
  --client-id asdfsdfgsdfgsdfgfghsdf \
  --auth-flow USER_PASSWORD_AUTH \
  --auth-parameters USERNAME=abel@example.com,PASSWORD=Test.1234 \
  --profile default \
  --region us-east-1 \
  --query AuthenticationResult.AccessToken \
  --output text`

$ echo $TOKEN

With the access token in hand, it's time to test the endpoint with it.

$ curl -H "Authorization:Bearer $TOKEN" https://abc1234.execute-api.us-east-1.amazonaws.com/secure
# some formatting added here
{
    "test": "Hello HttpApi",
    "claims": {
        "auth_time": "1586627310",
        "client_id": "asdfsdfgsdfgsdfgfghsdf",
        "event_id": "94872b9d-e5cc-42f2-8e8f-1f8ad5c6e1fd",
        "exp": "1586630910",
        "iat": "1586627310",
        "iss": "https://cognito-idp.us-east-1.amazonaws.com/us-east-qewretry",
        "jti": "878b2acd-ddbd-4e68-b097-acf834291d09",
        "sub": "cce30358-3c09-44ad-a2ec-5f7fca7dbd16",
        "token_use": "access",
        "username": "cce30358-3c09-44ad-a2ec-5f7fca7dbd16"
    }
}

Voilà! We've accessed the secure endpoint with a valid access token.

What about groups ?

I wanted to know more about possible granular control of the authorization and I went and created two Cognito Groups let's say Group1 and Group2. Then, I added my newly created user to both groups and repeated the experiment.

Once the user was added to the groups, I got a new token and issued the request to the secure endpoint.

$ curl -H "Authorization:Bearer $TOKEN" https://abc1234.execute-api.us-east-1.amazonaws.com/secure
# some formatting added here
{
    "test": "Hello HttpApi",
    "claims": {
        "auth_time": "1586627951",
        "client_id": "2p9k1pfhtsbr17a2fukr5mqiiq",
        "cognito:groups": "[Group2 Group1]",
        "event_id": "c450ae9e-bd4e-4882-b085-5e44f8b4cefd",
        "exp": "1586631551",
        "iat": "1586627951",
        "iss": "https://cognito-idp.us-east-1.amazonaws.com/us-east-qewretry",
        "jti": "51a39fd9-98f9-4359-9214-000ea40b664e",
        "sub": "cce30358-3c09-44ad-a2ec-5f7fca7dbd16",
        "token_use": "access",
        "username": "cce30358-3c09-44ad-a2ec-5f7fca7dbd16"
    }
}

Notice within the claims object, a new one has come up: "cognito:groups" and the value associated with it is "[Group2 Group1]".

Which means that we could potentially check this claim value to make some decisions in our application logic without having to handle all of the authentication inside the application code base.

This opens the possibility for more exploration within the AWS ecosystem. I hope this has been helpful, the full source code can be found at https://github.com/abelperezok/http-api-cognito-jwt-authorizer.

Monday, 23 March 2020

AWS Serverless Web Application Architecture

Recently, I've been exploring ideas about how to put together different AWS services to achieve a totally serverless architecture for web applications. One of the new services is the HTTP API which simplifies the integration with Lambda.

One general principle I want to follow when designing these architectural models is the separation of three main subsystems:

  • Identity service to handle authentication and authorization
  • Static assets traffic being segregated
  • Dynamic page rendering and server side logic
  • Application configuration outside the code

All these component will be publicly accessible via Route 53 DNS record sets pointing to the relevant endpoints.

Other general ideas across all design diagrams below are:

  • Cognito will handle authentication and authorization
  • S3 will store all static assets
  • Lambda will execute server side logic
  • SSM Parameter Store will hold all configuration settings

Architecture variant 1 - HTTP API and CDN publicly exposed

In this first approach, we have the S3 bucket behind CloudFront which is a common pattern when creating CDN-like structures. CloudFront takes care of all the caching behaviours as well as distributing the cached versions all over the Edge locations, so subsequent requests will be dispatched at a reduced latency. Also, CloudFront has only one cache behaviour, which is the default and one origin which is the S3 bucket.

It's also important to notice the CloudFront distribution has an Alternative Domain Name set to the relevant record set e.g. media.example.com and let's not forget about referencing the ACM SSL certificate so we can use the custom url and not the random one from CloudFront.

From the HTTP API perspective, it has only one integration which is a Lambda integration on the $default route, which means all requests coming from the HTTP endpoint will be directed to the Lambda function in question.

Similar to the case of CloudFront, the HTTP API requires a Custom Domain and Certificate to be able to use a custom url as opposed to the random one given by the API service on creation.

Architecture variant 2 - HTTP API behind CloudFront

In this second approach, we still have the S3 bucket behind CloudFront following the same pattern. However we've placed the HTTP API also behind CloudFront.

CloudFront becomes the traffic controller in this case, where several cache behaviours can be defined to make the correct decision where to route the request to.

Both record sets (media and webapp) are pointing to the same CloudFront distribution, it's the application logic's responsibility to request all static assets using the appropriated domain nam.

Since the HTTP API is behind a CF distribution, I'd suggest to set it up as Regional endpoint.

Architecture variant 3 - No CloudFront at all

Continue playing with this idea, what if we don't use CloudFront distribution at all? I gave it a go and it turns out that it's possible to achieve similar results.

We can use two HTTP APIs and set one to forward traffic to S3 for static assets and the other one to Lambda as per the usual pattern, each of those with Custom Domain and that solves the problem.

But I wanted to push it a little bit further, this time I tried with only one HTTP API and setting several routes e.g "/css/*", "/js/*" integrates with S3 and any other integrates with Lambda, it's then, application logic's responsibility to request all static assets using the appropriated url

Conclusion

These are some ideas I've been experimenting with, the choice of including or not a CloudFront distribution is dependent on the concrete use case, whether the source of our requests is local or globally diverse. Also, whether it is more suitable to have static assets under a subdomain or virtual directory under the same host name.

Never underestimate the power and flexibility of an API Gateway, especially the new HTTP API where it can front any number of combination of resources in the back end.

Saturday, 2 March 2019

How to create a dynamic DNS with AWS Route 53

Have you ever wanted to host some pet project or even a small website on your own domestic network? If so, you must have stumbled across the DNS resolution issue: since we depend on our ISP to get our "real IP address", there's no guarantee that the IP we see today will stay any longer the same.

You could update your domain's DNS records every time you detect the IP has changed, but obviously that's tedious and error prone. That's when dynamic DNS (DDNS) comes in. Services like No-IP,Duck DNS,etc can be helpful.

In this post I'll go through the steps involved when it comes to setting up your own DDNS service when you own a domain that has been registered in AWS Route 53.

Prerequisites

Before running the commands I suggest here, we need a couple of things to set up. Let's start by installing the required packages if you haven't already installed them.

  • sudo apt-get install awscli
  • sudo apt-get install jq

Configure AWS credentials

$ aws configure
AWS Access Key ID [None]: AKIAIOSFODNN7EXAMPLE
AWS Secret Access Key [None]: wJalrXUtnFEMI/K7MDENG/bPxRfiCYEXAMPLEKEY
Default region name [None]: eu-west-1
Default output format [None]: json

A hosted zone in AWS Route 53

$ aws route53 list-hosted-zones
{
    "HostedZones": [
        {
            "ResourceRecordSetCount": 5, 
            "CallerReference": " ... ", 
            "Config": {
                "Comment": "HostedZone created by Route53 Registrar", 
                "PrivateZone": false
            }, 
            "Id": "/hostedzone/Z2TLEXAMPLEZONE", 
            "Name": "abelperez.info."
        }
    ]
}

What's the plan?

The scenario I'm covering here is probably one of the most common. I want to create a new subdomain that points to my external IP and update that record as the external IP changes. To achieve that, we'll follow the steps:

  • Find out the external IP.
  • Get the desired hosted zone.
  • Create the A record (or update it if it already exists).
  • Set it up to run regularly (cron job).

Script step by step

Lest's start like any script, the shebang indicator. Then, input variables, in this case we define the domain name and the public record, notice the "." at the end of the public record, this is required by route 53.

#!/bin/bash
DOMAIN_NAME=abelperez.info
PUBLIC_RECORD=rpi.$DOMAIN_NAME.

Find the external IP, there are many ways to obtain this value, but since we're using AWS, let's get it from checkip endpoint. For debugging purposes we echo the IP found.

IP=$(curl -s http://checkip.amazonaws.com)
echo Found IP=$IP

Determine the hosted zone id, this step is optional if you want to use a hard-coded zone id that can be copied from the AWS Route 53 console. In this case I've invoked list-zones-by-name command which gives the hosted zone information for a specific domain, the format is as above in the prerequisites section. To extract the exact id I used a combination of jq and sed commands.

R53_HOSTED_ZONE=`aws route53 list-hosted-zones-by-name \
--dns-name $DOMAIN_NAME \
--query HostedZones \
| jq -r ".[] | select(.Name == \"$DOMAIN_NAME.\").Id" \
| sed 's/\/hostedzone\///'`

Now that we have all the required information, let's prepare the A record JSON input that will be used by aws route53 change-resource-record-sets command. the action "UPSERT" creates or updates the record accordingly, otherwise we'd need to manually check if it exists or not before updating it. Again for debugging purposes, we echo the final JSON.

read -r -d '' R53_ARECORD_JSON << EOM
{
  "Changes": [
    {
      "Action": "UPSERT",
      "ResourceRecordSet": {
        "Name": "$PUBLIC_RECORD",
        "Type": "A",
        "TTL": 300,
        "ResourceRecords": [
          {
            "Value": "$IP"
          }
        ]
      }
    }
  ]
}
EOM

echo About to execute change
echo "$R53_ARECORD_JSON" 

With the input ready, we invoke the Route 53 command to create/update the A record. This command will return immediately but the operation will take a few seconds to complete. If we want to make sure we know when it's completed, then we need to get the change id returned by the command, in this case, it's stored in the variable. This is optional, as well as the next step.

R53_ARECORD_ID=`aws route53 change-resource-record-sets \
--hosted-zone-id $R53_HOSTED_ZONE \
--change-batch "$R53_ARECORD_JSON" \
--query ChangeInfo.Id \
--output text`

echo Waiting for the change to update.

At this point, the request to create/update the A record is in progress, we could finish the script right now. However, I'd like to get a final confirmation that the operation has been completed. To do that, we can use the wait command providing the change id from the previous request.

aws route53 wait resource-record-sets-changed --id $R53_ARECORD_ID

echo Done.

And now it's actually completed. You should save this to a file, maybe name it update-dns.sh. It will need execute permission.

$ chmod u+x ./update-dns.sh

Set up cron job

In this particular instance I want this script to run in one of my raspberry pis, so I proceeded to copy the script file to pi user's home directory (/home/pi/)

pi@raspberrypi:~ $ ls
update-dns.sh

Now we'll set up a user cron job, we do that by running the command crontab -u followed by the user under which the job should run, this job doesn't require any system-wide privilege therefore it can run as the regular user, pi. -e to edit the file.

pi@raspberrypi:~ $ crontab -u pi -e

All we need to do is append the following text to the file content you are prompted with. The first two numbers correspond to minute and hour to run. For testing purposes I set it near the current time at the moment of testing it. The script output is appended/redirected to a text file so we can review afterwards if desired.

23 22 * * * /home/pi/update-dns.sh >> /home/pi/cron-update-dns.txt

See it in action

Once we've saved the crontab file, if it's the time where the cron job is about to start, we can test it by running tail -f command

pi@raspberrypi:~ $ tail -f cron-update-dns.txt

Finally, don't forget to update the port forwarding section on your home router so your open port directs traffic to a specific device, in my case, to that particular raspberry pi.

Thursday, 7 February 2019

Querying Aurora serverless database remotely using Lambda - part 3

This post is part of a series

In the previous part, we've set up the Aurora MySql cluster. At this point we can start creating the client code to allow querying.

The Lambda code

In this example I'll be using .NET Core 2.1 as Lambda runtime and C# as programming language. The code is very simple and should be easy to port to your favourite runtime/language.

Lambda Input

The input to my function consists of two main pieces of information: database connection information and the query to execute.

    public class ConnectionInfo
    {
        public string DbUser { get; set; }
        public string DbPassword { get; set; }
        public string DbName { get; set; }
        public string DbHost { get; set; }
        public int DbPort { get; set; }
    }

    public class LambdaInput
    {
        public ConnectionInfo Connection { get; set; }

        public string QueryText { get; set; }
    }

Lambda Code

The function itself returns a List of dictionary where each item of the list represents a "record" from the query result, these are in a key/value form where key is the "field" name and the value is the what comes form the query.

    public List<Dictionary<string, object>> RunQueryHandler(LambdaInput input, ILambdaContext context)
    {
        var cxnString = GetCxnString(input.Connection);
        var query = input.QueryText;

        var result = new List<Dictionary<string, object>>();
        using (var conn = new MySql.Data.MySqlClient.MySqlConnection(cxnString))
        {
            var cmd = GetCommand(conn, query);
            var reader = cmd.ExecuteReader();

            var columns = new List<string>();

            for (int i = 0; i < reader.FieldCount; i++)
            {
                columns.Add(reader.GetName(i));
            }

            while (reader.Read())
            {
                var record = new Dictionary<string, object>();
                foreach (var column in columns)
                {
                    record.Add(column, reader[column]);
                }
                result.Add(record);
            }
        }
        return result;
    }

Support methods

Here is the code of the missing methods: GetCxnString and GetCommand not really complicated.

    private static readonly string cxnStringFormat = "server={0};uid={1};pwd={2};database={3};Connection Timeout=60";

    private string GetCxnString(ConnectionInfo cxn)
    {
        return string.Format(cxnStringFormat, cxn.DbHost, cxn.DbUser, cxn.DbPassword, cxn.DbName);
    }

    private static MySqlCommand GetCommand(MySqlConnection conn, string query)
    {
        conn.Open();
        var cmd = conn.CreateCommand();
        cmd.CommandText = query;
        cmd.CommandType = CommandType.Text;
        return cmd;
    }

Project file

Before compiling and packaging the code we need a project file, assuming you don't have one already, this is how it looks like to be able to run in AWS Lambda environment.

<Project Sdk="Microsoft.NET.Sdk">

  <PropertyGroup>
    <TargetFramework>netcoreapp2.1</TargetFramework>
    <GenerateRuntimeConfigurationFiles>true</GenerateRuntimeConfigurationFiles>
  </PropertyGroup>

  <ItemGroup>
    <PackageReference Include="Amazon.Lambda.Core" Version="1.0.0" />
    <PackageReference Include="Amazon.Lambda.Serialization.Json" Version="1.3.0" />
    <PackageReference Include="MySql.Data" Version="8.0.13" />
    <PackageReference Include="Newtonsoft.Json" Version="11.0.2" />
  </ItemGroup>

  <ItemGroup>
    <DotNetCliToolReference Include="Amazon.Lambda.Tools" Version="2.2.0" />
  </ItemGroup>


Preparing Lambda package

Assuming you have both the code and csproj file in the current directory, we just run dotnet lambda package command as per below, where -c sets the Configuration to release, -f sets the target framework to netcoreapp2.1 and -o sets the output zip file name.

$ dotnet lambda package -c release -f netcoreapp2.1 -o aurora-lambda.zip
Amazon Lambda Tools for .NET Core applications (2.2.0)
Project Home: https://github.com/aws/aws-extensions-for-dotnet-cli, https://github.com/aws/aws-lambda-dotnet

Executing publish command
Deleted previous publish folder
... invoking 'dotnet publish', working folder '/home/abel/Downloads/aurora_cluster_sample/bin/release/netcoreapp2.1/publish'

( ... ) --- removed code for brevity ---

... zipping:   adding: aurora.lambda.deps.json (deflated 76%)
Created publish archive (/home/abel/Downloads/aurora_cluster_sample/aurora-lambda.zip).
Lambda project successfully packaged: /home/abel/Downloads/aurora_cluster_sample/aurora-lambda.zip

Next, we upload the resulting zip file to an S3 bucket of our choice. In this example I'm using a bucket named abelperez-temp and I'm uploading the zip file to a folder named aurora-lambda so I keep some form of organisation in my file directory.

$ aws s3 cp aurora-lambda.zip s3://abelperez-temp/aurora-lambda/
upload: ./aurora-lambda.zip to s3://abelperez-temp/aurora-lambda/aurora-lambda.zip

Lambda stack

To create the Lambda function, I've put together a CloudFormation template that includes:

  • AWS::EC2::SecurityGroup contains outbound traffic rule to allow port 3306
  • AWS::IAM::Role contains an IAM role to allow the Lambda function to write to CloudWatch Logs and interact with ENIs
  • AWS::Lambda::Function contains the function definition

Here is the full template, the required parameters are VpcId, SubnetIds and LambdaS3Bucket which we should get from previous stacks' outputs. The template outputs the function full name, which we'll need to be able to invoke it later.

Special attention to the Lambda function definition, the property Handler, in .NET runtime is in the form of AssemblyName::Namespace.ClassName::MethodName and the property Code containing the S3 location of the zip file we uploaded earlier.

Description: Template to create a lambda function 

Parameters: 
  LambdaS3Bucket:
    Type: String
  DbClusterPort: 
    Type: Number
    Default: 3306
  VpcId: 
    Type: String
  SubnetIds: 
    Type: CommaDelimitedList

Resources:
  LambdaSg:
    Type: AWS::EC2::SecurityGroup
    Properties:
      GroupDescription: Allow outbound traffic to MySQL host
      VpcId:
        Ref: VpcId
      SecurityGroupEgress:
        - IpProtocol: tcp
          FromPort: !Ref DbClusterPort
          ToPort: !Ref DbClusterPort
          CidrIp: 0.0.0.0/0

  AWSLambdaExecutionRole:
    Type: AWS::IAM::Role
    Properties:
      AssumeRolePolicyDocument:
        Version: 2012-10-17
        Statement:
          - Effect: Allow
            Principal:
              Service:
                - lambda.amazonaws.com
            Action: sts:AssumeRole
      Path: /
      Policies:
        - PolicyName: PermitLambda
          PolicyDocument:
            Version: 2012-10-17
            Statement:
            - Effect: Allow
              Action:
              - logs:CreateLogGroup
              - logs:CreateLogStream
              - logs:PutLogEvents
              - ec2:CreateNetworkInterface
              - ec2:DescribeNetworkInterfaces
              - ec2:DeleteNetworkInterface
              Resource: 
                - "arn:aws:logs:*:*:*"
                - "*"
  HelloLambda:
    Type: AWS::Lambda::Function
    Properties:
      Handler: aurora.lambda::project.lambda.Function::RunQueryHandler
      Role: !GetAtt AWSLambdaExecutionRole.Arn
      Code:
        S3Bucket: !Ref LambdaS3Bucket
        S3Key: aurora-lambda/aurora-lambda.zip
      Runtime: dotnetcore2.1
      Timeout: 30
      VpcConfig:
        SecurityGroupIds:
          - !Ref LambdaSg
        SubnetIds: !Ref SubnetIds

Outputs:
  LambdaFunction:
    Value: !Ref HelloLambda

To deploy this stack we use the following command where we pass the parameters specific to our VPC (VpcId and SubnetIds) as well as the S3 bucket name.

$ aws cloudformation deploy --stack-name fn-stack \
--template-file aurora_lambda_template.yml \
--parameter-overrides VpcId=vpc-0b442e5d98841996c SubnetIds=subnet-013d0bbb3eca284a2,subnet-00c67cfed3ab0a791 LambdaS3Bucket=abelperez-temp \
--capabilities CAPABILITY_IAM

Waiting for changeset to be created..
Waiting for stack create/update to complete
Successfully created/updated stack - fn-stack

Let's get the outputs as we'll need this information later. We have the Lambda function full name.

$ aws cloudformation describe-stacks --stack-name fn-stack --query Stacks[*].Outputs
[
    [
        {
            "OutputKey": "LambdaFunction",
            "OutputValue": "fn-stack-HelloLambda-C32KDMYICP5W"
        }
    ]
]

Invoking Lambda function

Now that we have deployed the function and we know its full name, we can invoke it by using dotnet lambda invoke-function command. Part of this job is to prepare the payload which is a JSON in put corresponding to the Lambda input defined above.

{
    "Connection": {
        "DbUser": "master", 
        "DbPassword": "Aurora.2019", 
        "DbName": "dbtest", 
        "DbHost": "db-stack-auroramysqlcluster-xxx.rds.amazonaws.com", 
        "DbPort": 3306
    }, 
    "QueryText":"show databases;"
}

Here is the command to invoke the Lambda function, including the payload parameter encoded to escape the quotes and all in a single line. There are better ways to do this, but for the sake of this demonstration, it's good enough.

$ dotnet lambda invoke-function \
--function-name fn-stack-HelloLambda-C32KDMYICP5W \
--payload "{ \"Connection\": {\"DbUser\": \"master\", \"DbPassword\": \"Aurora.2019\", \"DbName\": \"dbtest\", \"DbHost\": \"db-stack-auroramysqlcluster-xxx.rds.amazonaws.com\", \"DbPort\": 3306}, \"QueryText\":\"show databases;\" }" \
--region eu-west-1

Amazon Lambda Tools for .NET Core applications (2.2.0)
Project Home: https://github.com/aws/aws-extensions-for-dotnet-cli, https://github.com/aws/aws-lambda-dotnet

Payload:
[{"Database":"information_schema"},{"Database":"dbtest"},{"Database":"mysql"},{"Database":"performance_schema"}]

Log Tail:
START RequestId: 595944b5-73bb-4536-be92-a42652125ba8 Version: $LATEST
END RequestId: 595944b5-73bb-4536-be92-a42652125ba8
REPORT RequestId: 595944b5-73bb-4536-be92-a42652125ba8  Duration: 11188.62 ms   Billed Duration: 11200 ms       Memory Size: 128 MB     Max Memory Used: 37 MB

Now we can see the output in the Payload section. And that's how we can query remotely any Aurora serverless cluster without having to set up any EC2 instance. This could be extended to handle different SQL operations such as Create, Insert, Delete, etc.

Monday, 4 February 2019

Querying Aurora serverless database remotely using Lambda - part 2

This post is part of a series

In the previous part, we've set up the base layer to deploy our resources. At this point we can create the database cluster.

Aurora DB Cluster

Assuming we have our VPC ready with at least two subnets to comply with high availability best practices, let's create our cluster, I've put together a CloudFormation template that includes:

  • AWS::EC2::SecurityGroup contains inbound traffic rule to allow port 3306
  • AWS::RDS::DBSubnetGroup contains a group of subnets to deploy the cluster
  • AWS::EC2::DBCluster contains all the parameters to create the database cluster

Here is the full template, the only required parameters are VpcId and SubnetIds, but feel free to override any of the database cluster parameters such as database name, user name, password, etc. The template outputs the IDs corresponding to newly created resources such as the database cluster DNS endpoint, port and the security group.

Description: Template to create a serverless aurora mysql cluster

Parameters: 
  DbClusterDatabaseName: 
    Type: String
    Default: dbtest
  DbClusterIdentifier: 
    Type: String
    Default: serverless-mysql-aurora
  DbClusterParameterGroup: 
    Type: String
    Default: default.aurora5.6
  DbClusterMasterUsername: 
    Type: String
    Default: master
  DbClusterMasterPassword: 
    Type: String
    Default: Aurora.2019
  DbClusterPort: 
    Type: Number
    Default: 3306
  VpcId: 
    Type: String
  SubnetIds: 
    Type: CommaDelimitedList

Resources:
  DbClusterSg:
    Type: AWS::EC2::SecurityGroup
    Properties:
      GroupDescription: Allow MySQL port to client host
      VpcId:
        Ref: VpcId
      SecurityGroupIngress:
        - IpProtocol: tcp
          FromPort: !Ref DbClusterPort
          ToPort: !Ref DbClusterPort
          CidrIp: 0.0.0.0/0

  DbSubnetGroup: 
    Type: "AWS::RDS::DBSubnetGroup"
    Properties: 
      DBSubnetGroupDescription: "aurora subnets"
      SubnetIds: !Ref SubnetIds

  AuroraMysqlCluster:
    Type: AWS::RDS::DBCluster
    Properties:
      DatabaseName:
        Ref: DbClusterDatabaseName
      DBClusterParameterGroupName:
        Ref: DbClusterParameterGroup
      DBSubnetGroupName:
        Ref: DbSubnetGroup
      Engine: aurora
      EngineMode: serverless
      MasterUsername:
        Ref: DbClusterMasterUsername
      MasterUserPassword:
        Ref: DbClusterMasterPassword
      ScalingConfiguration:
        AutoPause: true
        MinCapacity: 2
        MaxCapacity: 4
        SecondsUntilAutoPause: 1800
      VpcSecurityGroupIds:
        - !Ref DbClusterSg
        
Outputs:
  DbClusterEndpointAddress:
    Value: !GetAtt AuroraMysqlCluster.Endpoint.Address
  DbClusterEndpointPort:
    Value: !GetAtt AuroraMysqlCluster.Endpoint.Port
  DbClusterSgId:
    Value: !Ref DbClusterSg

To deploy this stack we use the following command where we pass the parameters specific to our VPC (VpcId and SubnetIds).

$ aws cloudformation deploy --stack-name db-stack \
--template-file aurora_cluster_template.yml \
--parameter-overrides VpcId=vpc-0b442e5d98841996c SubnetIds=subnet-013d0bbb3eca284a2,subnet-00c67cfed3ab0a791

Waiting for changeset to be created..
Waiting for stack create/update to complete
Successfully created/updated stack - db-stack

Let's get the outputs as we'll need this information later. We have the cluster endpoint DNS name and the port as per our definition.

$ aws cloudformation describe-stacks --stack-name db-stack --query Stacks[*].Outputs
[
    [
        {
            "OutputKey": "DbClusterEndpointAddress",
            "OutputValue": "db-stack-auroramysqlcluster-1d1udg4ringe4.cluster-cnfxlauucwwi.eu-west-1.rds.amazonaws.com"
        },
        {
            "OutputKey": "DbClusterSgId",
            "OutputValue": "sg-072bbf2078caa0f46"
        },
        {
            "OutputKey": "DbClusterEndpointPort",
            "OutputValue": "3306"
        }
    ]
]

In the next part, we'll create the Lambda function to query this database remotely.

Wednesday, 30 January 2019

Querying Aurora serverless database remotely using Lambda - part 1

This post is part of a series

Why aurora serverless?

For those who like experimenting with new technology, AWS feeds us with a lot of new stuff every year at re:Invent conference, and many more times. In August 2018, Amazon announced its general availability. I was intrigued by this totally new way to doing database, so I started to play with it.

The first road block I found was connectivity from my local environment. I wanted to connect to my new cluster using my traditional MySQL Workbench client. It turned out to be one of the limitations clearly explained by Amazon, and as of today:

You can't give an Aurora Serverless DB cluster a public IP address. You can access an Aurora Serverless DB cluster only from within a virtual private cloud (VPC) based on the Amazon VPC service.

Most common workarounds involve the use of an EC2 instance to either run a MySQL client from there or SSH tunnel and allow connections from outside of the VPC. In both cases we'll be charged for the use of the EC2 instace. At the moment of this writing there is a solution for that, but still in beta: Data API.

With all that said, I decided to explore my own way in the meantime by creating a serverless approach involving Lambda to query my database.

Setting up the base - VPC

First, we need a VPC. For testing only, it doesn't really matter if we just use the default VPC in the current region. But if you'd like to get started with a blue print, there is this public CloudFormation template, it contains a sample VPC with two public subnets and two private subnets as well as all the required resources to guarantee connectivity (IGW, NAT, Route tables, etc.).

I prefer to isolate my experiments from the rest of the resources, that's why I came up with a template containing the bare minimum to get a VPC up and running. It only includes:

  • AWS::EC2::VPC the VPC itself - default CIDR block 10.192.0.0/16
  • AWS::EC2::Subnet private subnet 1 - default CIDR block 10.192.20.0/24
  • AWS::EC2::Subnet private subnet 2 - default CIDR block 10.192.21.0/24

Here is the full template, the only required parameter is EnvironmentName, but feel free to override any of the CIDR blocks. The template outputs the IDs corresponding to newly created resources such as the VPC and the subnets.

Description: >-
  This template deploys a VPC, with two private subnets spread across 
  two Availability Zones. This VPC does not provide any internet 
  connectivity resources such as IGW, NAT Gw, etc.

Parameters:
  EnvironmentName:
    Description: >-
      An environment name that will be prefixed to resource names
    Type: String

  VpcCIDR:
    Description: >-
      Please enter the IP range (CIDR notation) for this VPC
    Type: String
    Default: 10.192.0.0/16

  PrivateSubnet1CIDR:
    Description: >-
      Please enter the IP range (CIDR notation) for the private subnet 
      in the first Availability Zone
    Type: String
    Default: 10.192.20.0/24

  PrivateSubnet2CIDR:
    Description: >-
      Please enter the IP range (CIDR notation) for the private subnet 
      in the second Availability Zone
    Type: String
    Default: 10.192.21.0/24

Resources:
  VPC:
    Type: AWS::EC2::VPC
    Properties:
      CidrBlock: !Ref VpcCIDR
      EnableDnsSupport: true
      EnableDnsHostnames: true
      Tags:
        - Key: Name
          Value: !Ref EnvironmentName

  PrivateSubnet1:
    Type: AWS::EC2::Subnet
    Properties:
      VpcId: !Ref VPC
      AvailabilityZone: !Select [ 0, !GetAZs '' ]
      CidrBlock: !Ref PrivateSubnet1CIDR
      MapPublicIpOnLaunch: false
      Tags:
        - Key: Name
          Value: !Sub ${EnvironmentName} Private Subnet (AZ1)

  PrivateSubnet2:
    Type: AWS::EC2::Subnet
    Properties:
      VpcId: !Ref VPC
      AvailabilityZone: !Select [ 1, !GetAZs '' ]
      CidrBlock: !Ref PrivateSubnet2CIDR
      MapPublicIpOnLaunch: false
      Tags:
        - Key: Name
          Value: !Sub ${EnvironmentName} Private Subnet (AZ2)

Outputs:
  VPC:
    Description: A reference to the created VPC
    Value: !Ref VPC

  PrivateSubnet1:
    Description: A reference to the private subnet in the 1st Availability Zone
    Value: !Ref PrivateSubnet1

  PrivateSubnet2:
    Description: A reference to the private subnet in the 2nd Availability Zone
    Value: !Ref PrivateSubnet2

To create a stack from this template we run the following command (or go to AWS console and upload the template)

$ aws cloudformation deploy --stack-name vpc-stack \
--template-file vpc_template.yml \
--parameter-overrides EnvironmentName=Dev

Waiting for changeset to be created..
Waiting for stack create/update to complete
Successfully created/updated stack - vpc-stack

After successful stack creation, we can get the outputs as we'll need them for the next step.

$ aws cloudformation describe-stacks --stack-name vpc-stack --query Stacks[*].Outputs
[
    [
        {
            "Description": "A reference to the private subnet in the 1st Availability Zone",
            "OutputKey": "PrivateSubnet1",
            "OutputValue": "subnet-013d0bbb3eca284a2"
        },
        {
            "Description": "A reference to the private subnet in the 2nd Availability Zone",
            "OutputKey": "PrivateSubnet2",
            "OutputValue": "subnet-00c67cfed3ab0a791"
        },
        {
            "Description": "A reference to the created VPC",
            "OutputKey": "VPC",
            "OutputValue": "vpc-0b442e5d98841996c"
        }
    ]
]

In the next part, we'll create the Database cluster using these resources as a base layer.

Thursday, 27 September 2018

How to implement a CloudFormation Include custom tag using YamlDotNet

YAML has become a popular format used to describe a wide range of information in a more readable way. Depending on the concrete use case, these files can grow significantly. One example of this is AWS CloudFormation templates which can be written either in JSON or YAML.

Especially when working on Serverless projects, it doesn’t matter if it’s serverless framework, AWS SAM or just pure CloudFormation. The fact is the main file to maintain is (most of the time) a YAML template that grows over time.

I’d like to focus on a more concrete example: a typical serverless microservice architecture consists of a backend database, a function and a HTTP endpoint (i.e DynamoDB, Lambda and API Gateway). It’s also a common practice to use OpenAPI specification aka Swagger to describe the Web API interface.

In this case, when trying to use Lambda integration (either custom or proxy) we can’t use variables or intrinsic functions within the swagger file (we have to hardcode the lambda invocation url including account number and region, apart from the fact that function name might change if using autogenerated by CloudFormation), unless swagger content is inline in the Body property, which makes the file to grow by a great deal.

As of this writing, there are some strategies proposed by AWS to mitigate this problem, I personally find them a bit cumbersome to use on a daily basis:

  • AWS::CloudFormation::Stack It adds complexity to the whole process since we have to pass parameters to nested stacks and retrieve outputs from them in order to access information from both parties. The template for the nested stack must be stored on an Amazon S3 bucket, which adds friction to our development workflow while building.
  • AWS::Include Transform which is a form of macro hosted by AWS CloudFormation, is simpler than nested stacks but currently it still has some limiations:
    • The snippet has to be stored on an Amazon S3 bucket.
    • If the snippets change, your stack doesn't automatically pick up those changes.
    • It does not currently support using shorthand notations for YAML snippets.

Personally, I prefer a solution where at development time I can split the template in logical parts and then, before deploying it to AWS, compose them in one piece. I like the idea of include partials in specific parts of the parent file.

How to implement this include mechanism ?

YAML provides an extension mechanism named tags, where we can associate a particular data type with a tag (it’s basically a prefix added to a value). In YamlDotNet this is implemented by creating a custom type converter and mapping the new tag with the custom type converter.

IncludeTagConverter (custom type converter)

public class IncludeTagConverter: IYamlTypeConverter
{
    public bool Accepts(Type type)
    {
        return typeof(IncludeTag).IsAssignableFrom(type);
    }

    public object ReadYaml(IParser parser, Type type)
    {
        parser.Expect<MappingStart>();
        var key = parser.Expect<Scalar>();
        var val = parser.Expect<Scalar>();
        parser.Expect<MappingEnd>();

        if (key.Value != "File")
        {
            throw new YamlException(key.Start, val.End, "Expected a scalar named 'File'");
        }

        var input = File.ReadAllText(val.Value);
        var data = YamlSerializer.Deserialize(input);
        return data;
    }

    public void WriteYaml(IEmitter emitter, object value, Type type)
    {
    }
}

IncludeTag class

public class IncludeTag
{
    public string File { get; set; }
}

In this case we are indicating that IncludeTagConverter class should be used if the desiralization mechanism needs to deserialize an object of type IncludeTag. At the end of ReadYaml method, we call a helper class that starts deserialization process again with the content of the “included file”.

YamlSerializer helper class

public class YamlSerializer
{
    private const string IncludeTag = "!Include";

    public static object Deserialize(string yaml)
    {
        var reader = new StringReader(yaml);
        var deserializer = new DeserializerBuilder()
            .WithTypeConverter(new IncludeTagConverter())
            .WithTagMapping(IncludeTag, typeof(IncludeTag))
            .Build();
        var data = deserializer.Deserialize(reader);
        return data;
    }

    public static string Serialize(object data)
    {
        var serializer = new SerializerBuilder().Build();
        var yaml = serializer.Serialize(data);
        return yaml;
    }
}

In this helper class, we tell the deserializer that we are using a type converter and that it has to map !Include tags to data type of IncludeTag. This way, when it encounters an !Include in the yaml file, it will use our type converter to deserialize the content instead, which in turn, will read whatever file we put the name in File: key and will trigger the deserialization process again, thus, allowing us to execute this at several levels in a recursive way.

How do we compose a yaml ?

Once we have the whole file yaml object in memory, by triggering the deserialization process on the main yaml file, like this:

var data = YamlSerializer.Deserialize(input);

We only need to call Serialize again, and since we converted all the !Include tags into normal maps, sequence or scalars, there’s nothing extra we need to do to serialize it back using the default implementation.

var output = YamlSerializer.Serialize(data);

The output will be the composed file which can be saved and used after that.

Example:

Main yaml file (cloud-api.yaml)

Description: Template to create a serverless web api 

Resources:
  ApiGatewayRestApi:
    Type: AWS::ApiGateway::RestApi
    Properties:
      Name: Serverless API
      Description: Serverless API - Using CloudFormation and Swagger
      Body: !Include
        File: simple-swagger.yaml

simple-swagger.yaml file

swagger: "2.0"

info:
  version: 1.0.0
  title: Simple API
  description: A simple API to learn how to write OpenAPI Specification

paths:
  /persons: !Include
    File: persons.yaml
  /pets: !Include
    File: pets.yaml

persons.yaml file

get:
  summary: Gets some persons
  description: Returns a list containing all persons.
  responses:
    200:
      description: A list of Person
      schema:
        type: array
        items:
          required:
            - username
          properties:
            firstName:
              type: string
            lastName:
              type: string
            username:
              type: string

pets.yaml file

get:
  summary: Gets some pets
  description: Returns a list containing all pets.
  responses:
    200:
      description: A list of pets
      schema:
        type: array
        items:
          required:
            - petname
          properties:
            petname:
              type: string
            ownerName:
              type: string
            breed:
              type: string

Final result (composed file)

Description: Template to create a serverless web api
Resources:
  ApiGatewayRestApi:
    Type: AWS::ApiGateway::RestApi
    Properties:
      Name: Serverless API
      Description: Serverless API - Using CloudFormation and Swagger
      Body:
        swagger: 2.0
        info:
          version: 1.0.0
          title: Simple API
          description: A simple API to learn how to write OpenAPI Specification
        paths:
          /persons:
            get:
              summary: Gets some persons
              description: Returns a list containing all persons.
              responses:
                200:
                  description: A list of Person
                  schema:
                    type: array
                    items:
                      required:
                      - username
                      properties:
                        firstName:
                          type: string
                        lastName:
                          type: string
                        username:
                          type: string
          /pets:
            get:
              summary: Gets some pets
              description: Returns a list containing all pets.
              responses:
                200:
                  description: A list of pets
                  schema:
                    type: array
                    items:
                      required:
                      - petname
                      properties:
                        petname:
                          type: string
                        ownerName:
                          type: string
                        breed:
                          type: string

Thursday, 26 July 2018

How to push Windows and IIS logs to CloudWatch using unified CloudWatch Agent automatically

CloudWatch is a powerful monitoring and management tool, collects monitoring and operational data in the form of logs, metrics, and events, providing you with a unified view of AWS resources. One of the most common use cases is collecting logs from web applications.

Log files are generated locally in the form of text files and some running process monitor them and then decide where to send them. This is usually performed by the SSM Agent, however, as per AWS documents:

"Important The unified CloudWatch Agent has replaced SSM Agent as the tool for sending log data to Amazon CloudWatch Logs. Support for using SSM Agent to send log data will be deprecated in the near future. We recommend that you begin using the unified CloudWatch Agent for your log collection processes as soon as possible."

Assigning permissions to EC2 instances

EC2 instances need permission to access CloudWatch logs, if your current instances don’t have any roles associated, then create one with the CloudWatchAgentServerPolicy managed policy attached.

If your instances already have a role then you can add the policy to the existing role. In either case, the instance needs to perform operations such as CreateLogGroup, CreateLogStream, PutLogEvents and so on.

Install the CloudWatch Agent

On Windows Server, the installation process consists of three basic steps:

  1. Download the package from https://s3.amazonaws.com/amazoncloudwatch-agent/windows/amd64/latest/AmazonCloudWatchAgent.zip
  2. Unzip to a local folder
  3. Change directory to the folder containing unzipped package and run install.ps1

For more information about how to install the agent, see AWS documents.

Here is a powershell snippet to automate this process.

# Install the CloudWatch Agent
$zipfile = "AmazonCloudWatchAgent.zip"
$tempDir = Join-Path $env:TEMP "AmazonCloudWatchAgent"
Invoke-WebRequest -Uri "https://s3.amazonaws.com/amazoncloudwatch-agent/windows/amd64/latest/AmazonCloudWatchAgent.zip" -OutFile $zipfile
Expand-Archive -Path $zipfile -DestinationPath $tempDir -Force
cd $tempDir
Write-Host "Trying to uninstall any previous version of CloudWatch Agent"
.\uninstall.ps1

Write-Host "install the new version of CloudWatch Agent"
.\install.ps1

Creating configuration file

Before launching the agent, a configuration file is required, this configuration file can seem daunting at first, especially because it’s a different format from one used in SSM Agent. This configuration file contain three sections: agent, metrics and logs.

In this case, we are interested only in section logs which in turn has two main parts: windows_events (system or application events we can find in Windows Event Viewer) and files (any log files including IIS logs).

There are two common parameters required:

  • log_group_name - Used in CloudWatch to identify a log group, it should be something meaningful such as the event type or website name.
  • log_stream_name - Used in CloudWatch to identify a log stream within a log group, typically it’s a reference to the current EC2 instance.

Collecting Windows Events

Here is an example of a Windows Event log

{
    "event_levels": ["ERROR","INFORMATION"],
    "log_group_name": "/eventlog/application",
    "event_format": "text",
    "log_stream_name": "EC2AMAZ-NPQGPRK",
    "event_name": "Application"
}

Key points:

  • event_levels can be one or more of (INFORMATION, WARNING, ERROR, CRITICAL,VERBOSE).
  • event_name is typically one of (System, Security, Application)
  • event_format is text or xml.

Collecting IIS logs

Here is an example of an IIS website logs

{
    "log_group_name": "/iis/website1",
    "timezone": "UTC",
    "timestamp_format": "%Y-%m-%d %H:%M:%S",
    "encoding": "utf-8",
    "log_stream_name": "EC2AMAZ-NPQGPRK",
    "file_path": "C:\\inetpub\\logs\\LogFiles\\W3SVC2\\*.log"
}

Key points:

  • timezone and timestamp_format are optional.
  • encoding defaults to utf-8
  • file_path uses the standard Unix glob matching rules to match files, while all the examples in AWS docs display concrete log files, the example above matches all .log files within IIS logs folder, this is important since IIS create new files based on a rotation and we can’t predict their names.

These sections can be repeated for every website and for every Windows Event we’d like to push logs to CloudWatch. If we have several EC2 instances as web servers, this process can be tedious and error prone, therefore it should be automated. Here is an example of a powershell snippet.

$windowsLogs = @("Application", "System", "Security")
$windowsLoglevel = @("ERROR", "INFORMATION")
$instance = hostname

$iissites = Get-Website | Where-Object {$_.Name -ne "Default Web Site"}

$iislogs = @()
foreach ($site in $iissites) {
    $iislog = @{
        file_path = "$($site.logFile.directory)\w3svc$($site.id)\*.log"
        log_group_name = "/iis/$($site.Name.ToLower())"
        log_stream_name = $instance
        timestamp_format = "%Y-%m-%d %H:%M:%S"
        timezone = "UTC"
        encoding = "utf-8"
    }
    $iislogs += $iislog
}

$winlogs = @()
foreach ($event in $windowsLogs) {
    $winlog = @{
        event_name = $event
        event_levels = $windowsLoglevel
        event_format ="text"
        log_group_name = "/eventlog/$($event.ToLower())"
        log_stream_name = $instance
    }
    $winlogs += $winlog
}

$config = @{
    logs = @{
        logs_collected = @{
            files = @{
                collect_list = $iislogs
            }
            windows_events = @{
                collect_list = $winlogs
            }
        }
        log_stream_name = "generic-logs"
    }
}

# this could be any other location as long as it’s absolute
$configfile = "C:\Users\Administrator\amazon-cloudwatch-agent.json"

$json = $config | ConvertTo-Json -Depth 6 

# Encoding oem is important as the file is required without any BOM 
$json | Out-File -Force -Encoding oem $configfile

For more information on how to create this file, see AWS documents.

Starting the agent

With the configuration file in place, it’s time to start the agent, to do that, change directory to CloudWatch Agent installation path, typically within Program Files\Amazon\AmazonCloudWatchAgent and run the following command line:

.\amazon-cloudwatch-agent-ctl.ps1 -a fetch-config -m ec2 -c file:configuration-file-path -s 

Key points:

  • -a is short for -Action, fetch-config indicates it will reload configuration file.
  • -m is short for -Mode, in this case ec2 as opposed to onPrem.
  • -c is short for -ConfigLocation which is the configuration file previously generated.
  • -s is short for -Start which indicates to start the service after loading configuration.

Here is a powershell snippet covering this part of the process.

cd "${env:ProgramFiles}\Amazon\AmazonCloudWatchAgent"
Write-Host "Starting CloudWatch Agent"
.\amazon-cloudwatch-agent-ctl.ps1 -a fetch-config -m ec2 -c file:$configfile -s

Let’s test it.

Assuming we have 3 websites running in our test EC2 instance, let’s name them.

  • website1 - hostname: web1.local
  • website2 - hostname: web2.local
  • website3 - hostname: web3.local

After some browsing to generate some traffic, let’s inspect CloudWatch.

Some Windows Events also in CloudWatch Logs

Here is the complete powershell script.

Tuesday, 17 July 2018

Automate SSL certificate validation in AWS Certificate Manager using DNS via Route 53

When creating SSL certificates in AWS Certificate Manager, there is a required step before getting the certificate: Validate domain ownership. This seems obvious but to get a certificate you need to prove that you have control over the requested domain(s). There are two ways to validate domain ownership: by email or by DNS.

Use Email to Validate Domain Ownership

When using this option, ACM will send an email to the three registered contact addresses in WHOIS (Domain registrant, Technical contact, Administrative contact) then will wait for up to 72h for confirmation or it will time out.

This approach requires manual intervention which is not great for automation although there might be scenarios where this is applicable. See official AWS documentation.

Use DNS to Validate Domain Ownership

When using this option, ACM will need to know that you have control over the DNS settings on the domain, it will provide a pair name/value to be created as a CNAME record which it will use to validate and to renew if you wish so.

This approach is more suitable for automation since it doesn't require manual intervention. However, as of this writing, it's not supported yet by CloudFormation and therefore it will need to be done by using AWS CLI or API calls. Follow up the official announcement and comments. See official AWS documentation.

How to do this in the command line?

The following commands have been tested in bash on Linux 4.9.0-4-amd64 #1 SMP Debian 4.9.65-3+deb9u1, there shouldn't be much trouble if trying this on a different operation system, not tested on Windows though.

Some prerequisites:

  • AWS CLI installed and configured.
  • jq package installed and available in PATH.

Set the variable to store domain name and request the certificate to AWS ACM CLI command request-certificate

$ DOMAIN_NAME=abelperez.info

$ SSL_CERT_ARN=`aws acm request-certificate \
--domain-name $DOMAIN_NAME \
--subject-alternative-names *.$DOMAIN_NAME \
--validation-method DNS \
--query CertificateArn \
--region us-east-1 \
--output text`

At this point we have the certificate but it's not validated yet. ACM provides values for us to create a CNAME record so they can verify domain ownership. To do that, use aws acm describe-certificate command to retrieve those values.

Now, let's store the result in a variable to prepare for extracting name and value later.

$ SSL_CERT_JSON=`aws acm describe-certificate \
--certificate-arn $SSL_CERT_ARN \
--query Certificate.DomainValidationOptions \
--region us-east-1`

Extract name and value querying the previous json using jq.

$ SSL_CERT_NAME=`echo $SSL_CERT_JSON \
| jq -r ".[] | select(.DomainName == \"$DOMAIN_NAME\").ResourceRecord.Name"`

$ SSL_CERT_VALUE=`echo $SSL_CERT_JSON \
| jq -r ".[] | select(.DomainName == \"$DOMAIN_NAME\").ResourceRecord.Value"`

Let's verify that SSL_CERT_NAME and SSL_CERT_VALUE captured the right values.

$ echo $SSL_CERT_NAME
_3f88376edb1eda680bd44991197xxxxx.abelperez.info.

$ echo $SSL_CERT_VALUE
_f528dff0e3e6cd0b637169a885xxxxxx.acm-validations.aws.

At this point, we are ready to interact with Route 53 to create the record set using the proposed values from ACM, but first we need the Hosted Zone Id, it can be copied from the console, but we can also get it from Route 53 command line filtering by domain name.

$ R53_HOSTED_ZONE=`aws route53 list-hosted-zones-by-name \
--dns-name $DOMAIN_NAME \
--query HostedZones \
| jq -r ".[] | select(.Name == \"$DOMAIN_NAME.\").Id" \
| sed 's/\/hostedzone\///'`

Route 53 gives us the hosted zone id in the form of "/hostedzone/Z2TXYZQWVABDCE", the leading "/hostedzone/" bit is stripped out using sed command. Let's verify the hosted zone is captured in the variable.

$ echo $R53_HOSTED_ZONE
Z2TXYZQWVABDCE

With the hosted zone id, name and value from ACM, prepare the JSON input for route 53 change-resource-record-sets command, in this is case, Action is a CREATE, TTL can be the default 300 seconds (which is what AWS does itself through the console).

$ read -r -d '' R53_CNAME_JSON << EOM
{
  "Comment": "DNS Validation CNAME record",
  "Changes": [
    {
      "Action": "CREATE",
      "ResourceRecordSet": {
        "Name": "$SSL_CERT_NAME",
        "Type": "CNAME",
        "TTL": 300,
        "ResourceRecords": [
          {
            "Value": "$SSL_CERT_VALUE"
          }
        ]
      }
    }
  ]
}
EOM

We can check all variables were expanded correctly before preparing the command line.

$ echo "$R53_CNAME_JSON"
{
  "Comment": "DNS Validation CNAME record",
  "Changes": [
    {
      "Action": "CREATE",
      "ResourceRecordSet": {
        "Name": "_3f88376edb1eda680bd44991197xxxxx.abelperez.info.",
        "Type": "CNAME",
        "TTL": 300,
        "ResourceRecords": [
          {
            "Value": "_f528dff0e3e6cd0b637169a885xxxxxx.acm-validations.aws."
          }
        ]
      }
    }
  ]
}

Now we've verified everything is in place, finally we can create the record set using route 53 cli.

$ R53_CNAME_ID=`aws route53 change-resource-record-sets \
--hosted-zone-id $R53_HOSTED_ZONE \
--change-batch "$R53_CNAME_JSON" \
--query ChangeInfo.Id \
--output text`

This operation will return a change-id, since route 53 needs to propagate the change, it won't be available immediately, usually within 60 seconds, to ensure we can proceed, we can use the wait command. This command will block the console/script until the record set change is ready.

$ aws route53 wait resource-record-sets-changed --id $R53_CNAME_ID

After the wait, the record set is ready, now ACM needs to validate it, as per AWS docs, it can take up to several hours but in my experience it's not that long. By using another wait command, we'll block the console/script until the certificate is validated.

$ aws acm wait certificate-validated \
--certificate-arn $SSL_CERT_ARN \
--region us-east-1

Once this wait is done, we can verify that our certificate is in fact issued.

$ aws acm describe-certificate \
--certificate-arn $SSL_CERT_ARN \
--query Certificate.Status \
--region us-east-1
"ISSUED"

And this is how it's done, 100% end to end commands, no manual intervention, no console clicks, ready for automation.

Monday, 30 April 2018

Using Lambda@Edge to reduce infrastructure complexity

In my previous series I went through the process of creating the cloud resources to host a static website as well as the development pipeline to automate the process from push code in source control to deploy on a S3 bucket.

One of the challenges was how to approach the www to non-www redirection, the proposed solution consisted of duplicating the CloudFront distributions and the S3 website buckets in order to get the traffic end to end, the reason why I took this approach was because CloudFront doesn't have (to the best of my knowledge at the time) the ability to issue redirect, instead it just pass traffic to different origins based on configuration.

What is Lamda@Edge ?

Well, I was wrong, there is in fact a way to make CloudFront to issue redirects, it's called Lambda@Edge, a special flavour of Lambda functions that are executed on Edge locations and therefore closer to the end user. It allows a lot more than just issuing HTTP redirects.

In practice this means we can intercept any of the four events that happen when the user request a page to CloudFront and execute our Lambda code.

  • After CloudFront receives a request from a viewer (viewer request)
  • Before CloudFront forwards the request to the origin (origin request)
  • After CloudFront receives the response from the origin (origin response)
  • Before CloudFront forwards the response to the viewer (viewer response)

In this post, we're going to leverage Lambda@Edge to create another variation of the same infrastructure by using hooking our Lambda function to Viewer Request event, it will look like this one when finished.

How does it change from previous approach?

This time we still need two Route 53 record sets, because we're still handling both abelperez.info and www.abelperez.info.

We need only one S3 bucket, since redirection will be issued by Lambda@Edge, so no need for Redirection Bucket resource.

We need only one CloudFront distribution as there a single origin, but this time the CloudFront distribution will have two CNAMEs in order to handle both www and non-www. We'll also link the lambda function with the event as part of default cache behaviour.

Finally we need to create a Lambda function to performs the redirection when necessary.

Creating Lambda@Edge function

Creating a Lambda@Edge function is not too far from creating an ordinary Lambda function, but we need to be aware of some limitations (at least at the moment of writing), they need to be created only in N. Virginia (US-East-1) region and the available runtime is NodeJs 6.10.

Following the steps from AWS CloudFront Developer Guide, you can create your own Lambda@Edge function and connect it to a CloudFront distribution. Here are some of my highlights:

  • Be aware of the required permissions, telling Lambda to create the role is handy.
  • Remove triggers before creating the function as it can take longer to replicate
  • You need to publish a version of the function before associating with any trigger.

The code I used is very simple, it only reads host header from the request and verify if it's equal to 'abelperez.info' to send a custom response with a HTTP 301 redirection to www domain host, in any other case, it just let it pass ignoring the request, therefore CloudFront will proceed with the request life cycle.

exports.handler = function(event, context, callback) {
  const request = event.Records[0].cf.request;
  const headers = request.headers;
  const host = headers.host[0].value;
  if (host !== 'abelperez.info') {
      callback(null, request);
      return;
  }
  const response = {
      status: '301',
      statusDescription: 'Moved Permanently',
      headers: {
          location: [{
              key: 'Location',
              value: 'https://www.abelperez.info',
          }],
      },
  };
  callback(null, response);
};

Adding the triggers

Once we have created and published the Lambda fuction, it's time to add the trigger, in this case it's CloudFront and we need to provide the CloudFront distribution Id and select the event type which is viewer-request as stated above.

From this point, we've just created a Lambda@Edge function!

Let's test it

The easiest way to test what we've done is to issue a couple of curl commands, one requesting www over HTTPS expecting a HTTP 200 with our HTML and another one request to non-www over HTTP expecting a HTTP 302 with the location pointing to www domain. Here is the output.

abel@ABEL-DESKTOP:~$ curl https://www.abelperez.info
<html>
<body>
<h1>Hello from S3 bucket :) </h1>
</body>
</html>
abel@ABEL-DESKTOP:~$ 
abel@ABEL-DESKTOP:~$ curl http://abelperez.info
<html>
<head><title>301 Moved Permanently</title></head>
<body bgcolor="white">
<center><h1>301 Moved Permanently</h1></center>
<hr><center>CloudFront</center>
</body>
</html>

An automated version of this can be found at my github repo

Thursday, 5 April 2018

Completely serverless static website on AWS

Why serverless ? The basic idea behind this is not to worry about the underlying infrastructure, the Cloud provider will expose services through several interfaces where we allocate resources and use them, and more importantly, pay only for what we use.

This approach helps to prove concepts with little or no budget, also allows to scale as the business grows on demand. All that solves the problem of over provisioning and paying for idle boxes.

One of the common scenarios is having a content website, in this case I'll focus on static website. In this series I'll explain step by step how to create all the environment from development to production on AWS.

At the end of this series we'll have created this infrastructure:

Serverless static website - part 1 - In this part you'll learn how to start with AWS and how to use Amazon S3 to host a static website, making it publicly accesible by its public endpoint url.

Serverless static website - part 2 - In this part you'll learn how to get your own domain and put it in use straight away with the static website.

Serverless static website - part 3 - In this part you'll learn how to get around the problem of having www as well as non-www domain, and how get always redirect to the www endpoint.

Serverless static website - part 4 - In this part you'll learn how to create a SSL certificate via Amazon Certificate Manager and verify the domain identity.

Serverless static website - part 5 - In this part you'll learn how to distribute the content throughout the AWS edge locations and handling SSL traffic.

Serverless static website - part 6 - In this part you'll learn how to set up a git repository using CodeCommit repository, so you can store your source files.

Serverless static website - part 7 - In this part you'll learn how to set up a simple build pipeline using a CodeBuild project.

Serverless static website - part 8 - In this part you'll learn how to automate the process of triggering the build start action when some changes are pushed to the git repository.

Serverless static website - part 9 - In this part you'll learn how the whole process can be automated by using CloudFormation templates to provision all the resources previously described manually.

Serverless static website - part 9

One of the greatest benefits of cloud computing is the ability to automate processes and up to this point, we've learned how to set everything up via AWS console web interface.

Why automate?

It is always good to know how to manage stuff via console in case we need to manually modify something, but we should aim to avoid this practice. Instead, limit the use of the console to a bare minimum and the rest of the time, aim for some automated way, this has the following advantages:

  • We can keep source code / templates under source control, allowing to keep track of changes.
  • It can be reused to replicate in case of a new customer / new environment / etc.
  • No need to remember where every single option is located as the UI can change.
  • It can be transferred to another account in a matter of a few minutes.

In AWS world, the automated process is achieved by creating templates in CloudFormation and deploying them to stacks.

I have already created a couple of CloudFormation templates to automate all the process described to this point, they can be found at my GitHub repo.

CloudFormation templates

In order to automate this infrastructure, I've divided resources into two separate templates: one containing the SSL certificate and the other containing all the rest of the resources. The reason why the SSL certificate is in another template is because it needs to be run on N. Virginia region (US-East-1) as explained earlier when we created it manually, it's a CloudFront requirement.

Templates can contain parameters that make them more flexible, in this case, there is a parameter that controls the creation of a redirection bucket, we might have a scenario when we want just a website on a sub domain and we might not want to redirect from the naked domain. These are the parameters:

SSL Certificate template

  • DomainName: The site domain name (naked domain only)

Infrastructure template

  • HostedZone: This is just for reference, it should not be changed
  • SSLCertificate: This should be taken from the output of the SSL certificate template
  • DomainName: Same as above, only naked domain
  • SubDomainName: specific sub domain, typically www
  • IncludeRedirectToSubDomain: Whether it should include a redirection bucket from the naked domain to the subdomain

Creating SSL certificate Stack

First, let's make sure we are in N. Virginia region. Go to CloudFormation console, once there, click Create Stack button. We are presented with Select Template screen, where we'll choose a template from my repository (ssl-certificate.yaml) by selecting Upload a template to Amazon S3 radio button.

Click Next, you'll see the input parameters page including the stack name which I'll name abelperez-info-ssl-stack to give it some meaningful name.

After entering the required information, click Next and Next again, then on Create button. You'll see the Create in progress status in the stack.

At this point, the SSL certificate is being created and will require the identity verification just like when it was created manually, this will block the stack creation until the validation process is finished, so go ahead and check your email and follow the link to validate the identity to proceed with the stack creation.

Once the creation is done you'll see the Create complete status in the stack, on the lower pane, select Outputs, you'll find SSLCertificateArn. Take that value and copy it somewhere temporarily, we'll need it for our next stack.

Creating Infrastructure Stack

Following a similar process, let's create the second stack containing most of the resources to provision. In this case we are not forced to create it in any specific region, we can choose any provided all the services are available, for this example I'll Ireland (EU-West-1). The template can be downloaded from my repository (infrastructure.yaml).

This time, you are presented a different set of parameters, SSL Certificate will be the output of the previous stack as explained above. Domain name will be exactly the same as in the previous stack, give we are using the SSL certificate for this domain. Subdomain will be www and I'll include a redirection as I expect users to be redirected from abelperez.info to www.abelperez.info. I'll name the stack abelperez-info-infra-stack just to make it meaningful.

Since this template will create IAM users, roles and policies, we need to acknowledge this by ticking the box.

Once we hit Create, we can see the Create in progress screen.

This process can take up to 30 minutes, so please be patient, this takes so long time to create the stack because we are provisioning CloudFront distributions and they can take some time to propagate.

Once the stack is created, we can take note of a couple of values from the output: CodeCommit repository url (either SSH or HTTPS) and the Static bucket name.

Manual steps to finish the set up.

With all resource automatically provisioned by the templates, we are in a position where the only thing we need is to link our local SSH key with the IAM user. To do that, let's do exactly what we did when it was set up manually in part 6.

In my case, I chose to use SSH key, so I went to IAM console, found the user, under Security Credentials, I uploaded my SSH public key.

We also need to update the buildspec.yml to run our build, can be downloaded from the above linked GitHub repository. The placeholder <INSERT-YOUR-BUCKET-NAME-HERE> must be replaced with the actual bucket name, in this instance the bucket name generated is abelperez-info-infra-stack-staticsitebucket-1ur0k115f2757 and my buildspec.yml looks like:

version: 0.2

phases:
  build:
    commands:
      - mkdir dist
      - cp *.html dist/

  post_build:
    commands:
      - aws s3 sync ./dist 
        s3://abelperez-info-infra-stack-staticsitebucket-1ur0k115f2757/ 
        --delete --acl=public-read

Let's test it!

Our test consist of cloning the git repository from CodeCommit, add two files: index.html and buildspec.yml. Then we'll perform a git push and we expect it will trigger the build executing the s3 sync command and copying the index.html to our destination bucket which will be behind CloudFront and CNamed by Route 53. In the end, we should be able to just browse www.abelperez.info and get whatever the result is in index.html just uploaded.

Just a note, if you get a HTTP 403 instead of the expected HTML, then just wait for a few minutes, CloudFront/Route 53 might not be fully propagated just yet.

abel@ABEL-DESKTOP:~$ git clone ssh://git-codecommit.eu-west-1.amazonaws.com/v1/repos/www.abelperez.info-web
Cloning into 'www.abelperez.info-web'...
warning: You appear to have cloned an empty repository.
abel@ABEL-DESKTOP:~$ cd www.abelperez.info-web/
abel@ABEL-DESKTOP:~/www.abelperez.info-web$ git add buildspec.yml index.html 
abel@ABEL-DESKTOP:~/www.abelperez.info-web$ git commit -m "initial commit"
[master (root-commit) dc40888] initial commit
 Committer: Abel Perez Martinez 
Your name and email address were configured automatically based
on your username and hostname. Please check that they are accurate.
You can suppress this message by setting them explicitly. Run the
following command and follow the instructions in your editor to edit
your configuration file:

    git config --global --edit

After doing this, you may fix the identity used for this commit with:

    git commit --amend --reset-author

 2 files changed, 16 insertions(+)
 create mode 100644 buildspec.yml
 create mode 100644 index.html
abel@ABEL-DESKTOP:~/www.abelperez.info-web$ git push
Counting objects: 4, done.
Delta compression using up to 4 threads.
Compressing objects: 100% (4/4), done.
Writing objects: 100% (4/4), 480 bytes | 0 bytes/s, done.
Total 4 (delta 0), reused 0 (delta 0)
To ssh://git-codecommit.eu-west-1.amazonaws.com/v1/repos/www.abelperez.info-web
 * [new branch]      master -> master
abel@ABEL-DESKTOP:~/www.abelperez.info-web$ curl https://www.abelperez.info
<html>
<body>
<h1>Hello from S3 bucket :) </h1>
</body>
</html>